The French baguette is the quintessential bread to master, but I warn you, it’s a lot like snowboarding; easy to learn but hard to master. Every step of the baguette making process needs to be done just right of the bread will turn out less than satisfying. Also, you need to be in the right frame of mind. To make a fine baguette, you have to enjoy the process and for that, you need allocate time. This is a process that cannot be hurried. It takes two days and several hours to get the right tastes and textures.
Note to American home bakers: the ingredient list is weight based rather than volume based as you are probably used to. I could have converted for you, but that skirts an important point about baking; namely, that baking is an exacting effort and for that you need the precision of a weight-based recipe. Do yourself a favor and get a large and small scale for weighing. This is especially acute for high-altitude bakers. Once you figure out how to adjust this recipe for your elevation, you’ll want to be able to reproduce it exactly.
On the surface a French baguette seems so simple an engineer could do it, at least the ingredients are simple:
- 720g all purpose flour
- 581g water
- 14g salt
- 3g active dry yeast
Notice that’s there are no fats. That’s good of you watch your fat in take. However, if you are on a Keto diet, lack of fat is bad and look at all those carbs.
Normally one tempers the water prior to starting to make sure it is the right temperature for the flour and room but we are going to dispense with that for now and recommend you weigh out the water in advance and let it get to room temperature. If you want to learn about tempering the dough for proper kneading, check out my tempering page.
Process – Day 1
- Mise en place – this means premeasure all your ingredients into different containers. To put the importance of this in the context of the seven habits of highly successful bakers; “begin with the end in mind.”
- In a countertop mixer, pour the flour in the bowl. On one side, pour in the dry yeast and on the other side the salt (don’t let the salt come in contact with the yeast.
- Using the dough hook attachment, turn the mixer speed to #1 and pour in the water. Mix at this speed for 5 minutes. You may have to use a spatula to get the flour on the edges into the mix.
- Turn mixer speed up to #4 for 5 minutes. This is a kneading process so don’t short change the time.
- First Proof: Using a plastic dough scraper, scrap dough into a bowl and cover with plastic film and either put in dark place of cover with a towel to reduce light exposure. Leave for 30 minutes at room temperature.
- First Fold: Transfer dough onto floured surface an roll out to approximately an 8″ x 12″ rectangle. Make one fold along middle of 12″ length and press edges with fingers.
- Refrigerate: Transfer dough into a bowl and cover with film. Put in refrigerator overnight (12 hours min).
Process – Day 2
- Divide Dough: Remove dough from frig and separate into four ~330g pieces. Roll each piece into a 8″ x 12″ rectangle. Fold the dough in a simple fold: fold one end to the center of the length. Fold the other end to the center. Now fold along the center and press edges with fingers.
- Shape Baguettes: On floured surface, roll the dough using your hands into the final shape. Start in the center of the dough working toward the edges as you roll. Don’t over-roll.
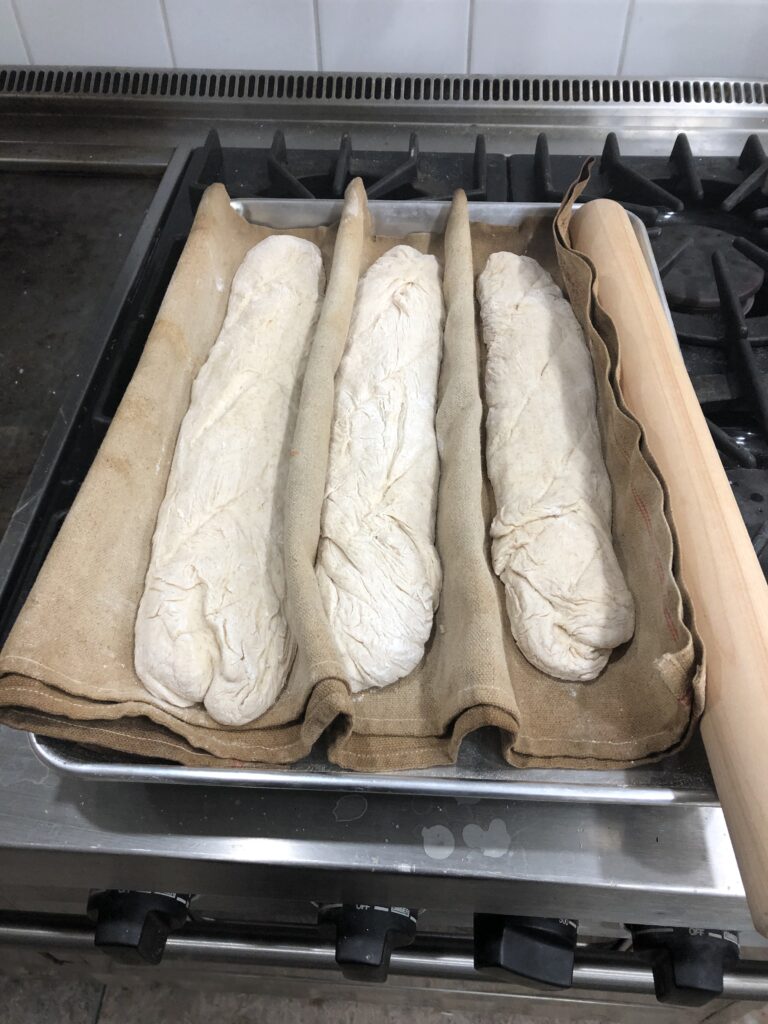
- Use Proofing Cloth: line a baking sheet with a large floured cloth. Can buy proofing cloths but any flour cloth will do. It needs to be at least twice wider than your baking sheet. Fold one side of the floured cloth against the side of the pan and place the first baguette long inside edge of the sheet. Pinch the sheet to make a ridge next to the baguette. Now place the second baguette against the pinched cloth and repeat. After placing the last baguette in the pan, slip the rolling pin under the cloth to hold the cloth in place. Note: place the baguettes so their seams are down and sprinkle with flour.
- Second Proofing: Cover baguettes with a cloth and let rise for 60 minutes at 26 C. Do not to over proof. Half way through, preheat oven to 420 deg. C for 30 minutes. Put a small metal bowl in the oven.
- Transfer from proofing cloth: The baguettes are very fragile so transferring them to the baking pan can be dicey. To do this, use a thin wooden or plastic board. Put the board against the bottom of the baguette and lift the cloth to roll the baguette onto the board. Next you can roll the baguette off the board onto a flour dusted baking pan. Note1: use your finger to draw four lines on the tray to indicate where each baguette should be placed. Note2: try to roll the baguette from the board onto the baking tray so that the seam in the bread is down. Repeat for all four baguettes.
- Dust and slit each baguette. Using a razor, make three diagonal slits along the top of the dough about 1/8″ deep. This is to help the bread bake better.
- Bake: Put tray in oven for 30 minutes. It will probably take less time at elevation so watch it. Note: a traditional French oven will steam the bread a few seconds at the start of the bake. I drop a couple ice cubes into the bowl we were preheating at the start of the bake. Also, you can skip the steaming and get a softer crust (Italian style).
- Cool on a cooling rack. Open a bottle of wine, a wedge of brie, and a jar of stone fruit jam and enjoy. Note: don’t put bread in bags until completely cooled.
FYI: for 1 euro in France, you can skip all this and just have a pro make your baguette for you. Although its hard picking through the forty varieties they offer.

Comments are closed