In French cooking there’s an expression called “Mise en Place”, which translates to “setting up”. The principle of Mise en Place is to measure and prepare all your ingredients prior to starting. That works in a fully established kitchen, but for our journey into the fascinating world of Charcuterie (i.e., cured meats), we must take a step back and start with setting up all the equipment we need just to get started with preparing cured meats.
As mentioned in a previous blog, there are two methods for curing meat: hot curing and cold curing. Hot curing takes one day start to finish and relies on both curing salt and heat to kill harmful bacteria that can spoil the meat and possibly make you sick. Cold curing involves fermenting the meat over three-months in a tightly controlled temperature and humidity environment. Cold cured meats, in my opinion, taste better, but hot cured meats are more certain. A lot more equipment is required to cold cure meats, so we will work our way into that equipment list over time. Hot curing meats involves many of the same pieces of equipment as cold cured meats, but the final list is not as extensive.
The equipment list for hot cured meat is pretty much what you’d expect; a meat grinder, a sausage stuffer, a cooking source, which can be an oven or a smoker, and a vacuum sealer. An optional piece of equipment is a device for stirring the ingredients, but I don’t really consider it a requirement unless you are doing large batch processing. We will take a look at each item on our equipment list and discuss options ranging from the DIY all the way up to commercial food
Before starting, I should mention that I have no corporate sponsors, so I am not hawking anyone’s products and will give you my honest assessment. I should also discuss my personal preference when it comes to food and kitchen equipment. Years ago, when I owned a winery and distillery, I used equipment ranging from commercial, consumer, and DIY. I found myself preferring commercial grade equipment for several reasons, first, commercial grade equipment is better constructed, usually from stainless-steel, and stands up to harsh conditions. Commercial grade usually has better motors, gears, can be repaired, and is easier to disassemble for cleaning. Another feature I like is the lack of features in commercial grade equipment versus consumer grade kitchen equipment. I don’t need, for example, 20 power options with little icons, I just need an on and off switch to be happy. On the downside, commercial grade equipment tends to run louder, can take up more space, and for some, is not as elegant and since most consumer kitchen are built on aesthetics rather and functionality, that matters to a lot of people. The bottom line is you can usually find a lower priced consumer rated option to the one I recommend if you are willing to sacrifice quality, ruggedness, and longevity.
As far as the equipment costs for getting set up ,I have to be honest and say you can get by for as little as $22 in equipment. My set-up cost me $1,440, which seems ridiculous, until you consider what it costs to pay a commercial processor to process your game, and what you save by not having to buy beef at the store for $10/lb. While my set-up strives to find a balance between low cost and high quality, you could easily spend several thousand dollars more on the equipment list. Truth be told, I’m a bit of a fiscal conservative, which is a polite way of saying I’m cheap. I did not buy all my equipment at once, I started with a thrift store electric smoker and $22 hand crank grinder. A few years later I added a used electric grinder I picked up at a garage sale for $20. My first big equipment purchase came after buying and then returning several vacuum sealers because they broke after a few cycles, I splurged and bought a commercial grade sealer for $450. That was a huge purchase for cheap-ass engineer like me and I agonized for months trying to justify the necessity. I never regretted that purchase though, because I use it all the time in the kitchen, especially for Sous Vide cooking, which I do a lot, and for food storage when I buy meats and produce on sale.
With a toe in the meat processing equipment arena, I next purchased a stuffer, which I admit was a luxury, but one well worth $180. With a good stuffer, making sausages became a joy not a chore. In fact, I enjoyed using it so much I branched into cold curing meats, which is a far more complicated process than hot curing. Once I got into cold curing, it became clear I needed a heavy use meat grinder and after months of research and talking with other light meat processors, chose the LEM Big Bite to be the best value in terms of ruggedness, power, and durability. Relative to the cost of a good quality meat grinder the LEM Big Bite at $400 is a bargain. At that point it was “in for a penny, in for a pound,” and I got a commercial box for stirring all the ingredients for $110, which I admit is another luxury I could have done without.
Item 1: Meat Grinders
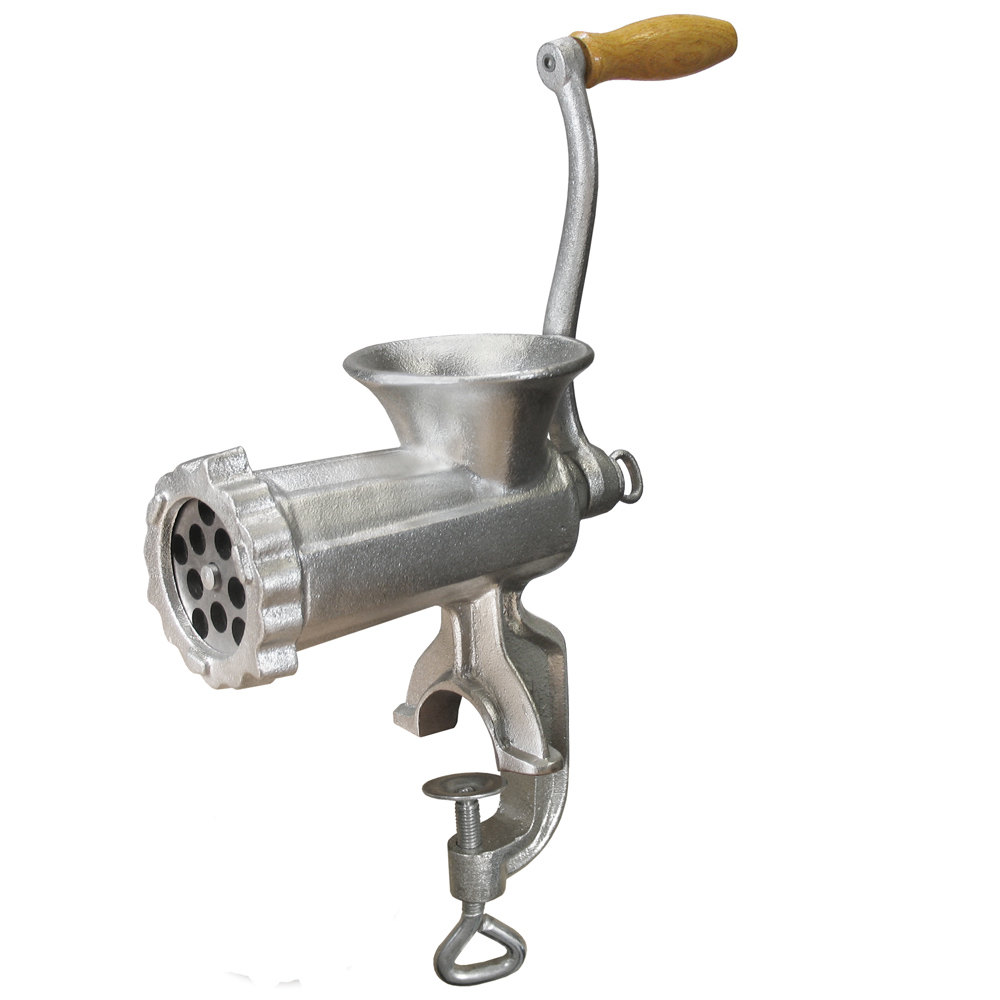
Manual: When I first started making sausage twenty years ago, my meat grinder was a bench-top, hand-crank, cast iron beauty I still use for a backup. It’s slow, requires a lot of muscle, but is not only dependable, it grinds meat was well as any machine grinder. My hand-crank’s an antique I bought at a farm auction but you can purchase a good quality manual grinder like this one from Webstaurant for $22, that comes with three stuffing tubes as well. The nice thing about these manual meat grinders is that you can control the speed, the downside is you have to cut the raw meat pretty small to get it through the funnel. You also don’t want the meat to be too stiff or it will be hard to crank.
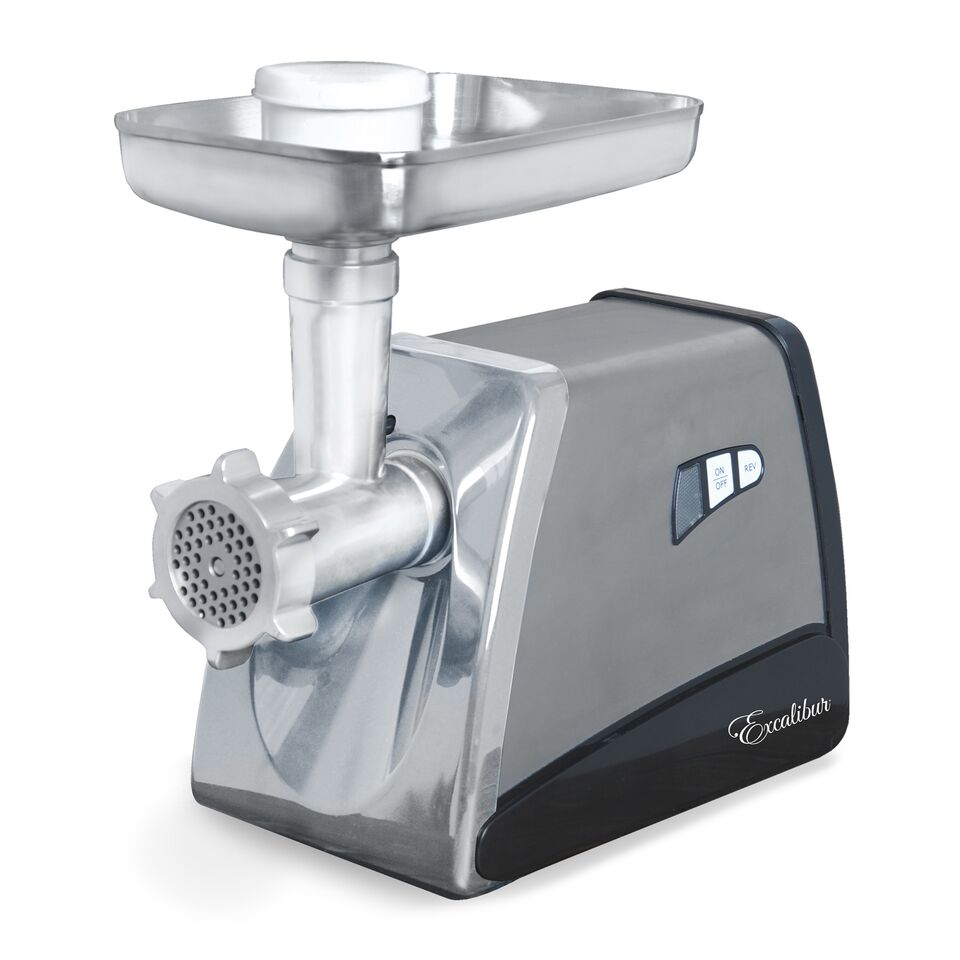
Light Use Electric: Once you make the move to electric meat grinders, you enter a world where nothing seems as it appears where grinders that look powerful and beefy can’t cut and some that look diminutive are monster grinders. I have a light-use grinder like this with a plastic housing and cast aluminum grinder attachment that I paid $20 for at a garage sale. I needed one quick after I shot my first elk and figured once it burned out, I’d upgrade to better one. Well twenty years later it’s still working and grinding away. The only complaint I have is that it does not do a good job grinding fat, and sausage always has fat added. It does a great job on the first pass cutting with the 0.5″ plate, but on the second grind with the 3/8″ plate the fat constantly gets wrapped around the cutter the clogs the plate openings, which is a bit frustrating because you constantly have to stop and clean it. More expensive grinders have a reverse gear that is supposed to eliminate this, but from what my friends tell me, it doesn’t always work. If you’re grinder budget is less than $300, you’re in this light use camp and your grinder will be slow and at times frustrating to work with, but it will get the job done.
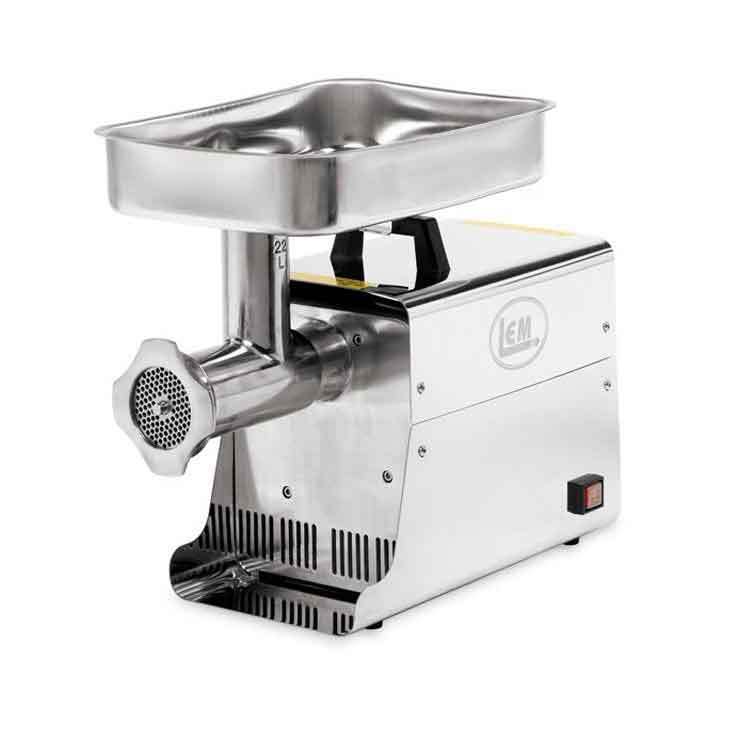
Heavy Use Electric: Should you decide you’re a serious outdoorsman or meat processor, you need to step up to the heavy use class of meat grinders. Here you will find everything from fancy consumer grinders that look sharp in the kitchen to commercial grinders that belong a butcher shop. I looked at many in this class and found the LEM Big Bite to be the best value. I use their #8 1/2 HP grinder and have yet to have more processing to do than this can handle, and that’s all the way up to processing a large elk. It did cost $400 but pays for itself the first time you don’t have to have your game commercially processed. This bad boy is so powerful that people grind whole chickens, including the bones, for homemade dog food, but that’s not my deal. You can spend a great deal more on a heavy use grinder, but unless you own a butcher shop, this one will meet your needs, stand up to years of rugged use, and will be a joy to work with.
Item 2: Stuffers

Most meat grinders have a sausage stuffer attachment, and they do an adequate job even if they can be frustrating to use at times. Also, stuffing attachments on meat grinders don’t pack a casing as evenly and consistently as a dedicated sausage stuffer does. It seems that each time I use a grinder’s sausage stuffer attachment I split casings, get air pockets, and the texture of the meat is mushier due to a third pass through the grinder. Plus, the stuffing tube is so short I’m constantly reloading casing. It’s hard to find a quality stuffer that’s used because the folks who buy them are serious about meat processing and never let them go. Also, a good stuffer will last a lifetime and beyond, so they get handed down. The commercial grade stuffer I use cost $180. I like it because everything is stainless steel, has a 7-pound tank, and the stuffing tubes are long. While this is an optional piece of equipment if you have a grinder with a stuffing attachment, I recommend using one if you plan to make sausage and salami often as it makes the entire experience faster, more enjoyable, and results in higher quality product.
Item 3: Something to Stir the Ingredients
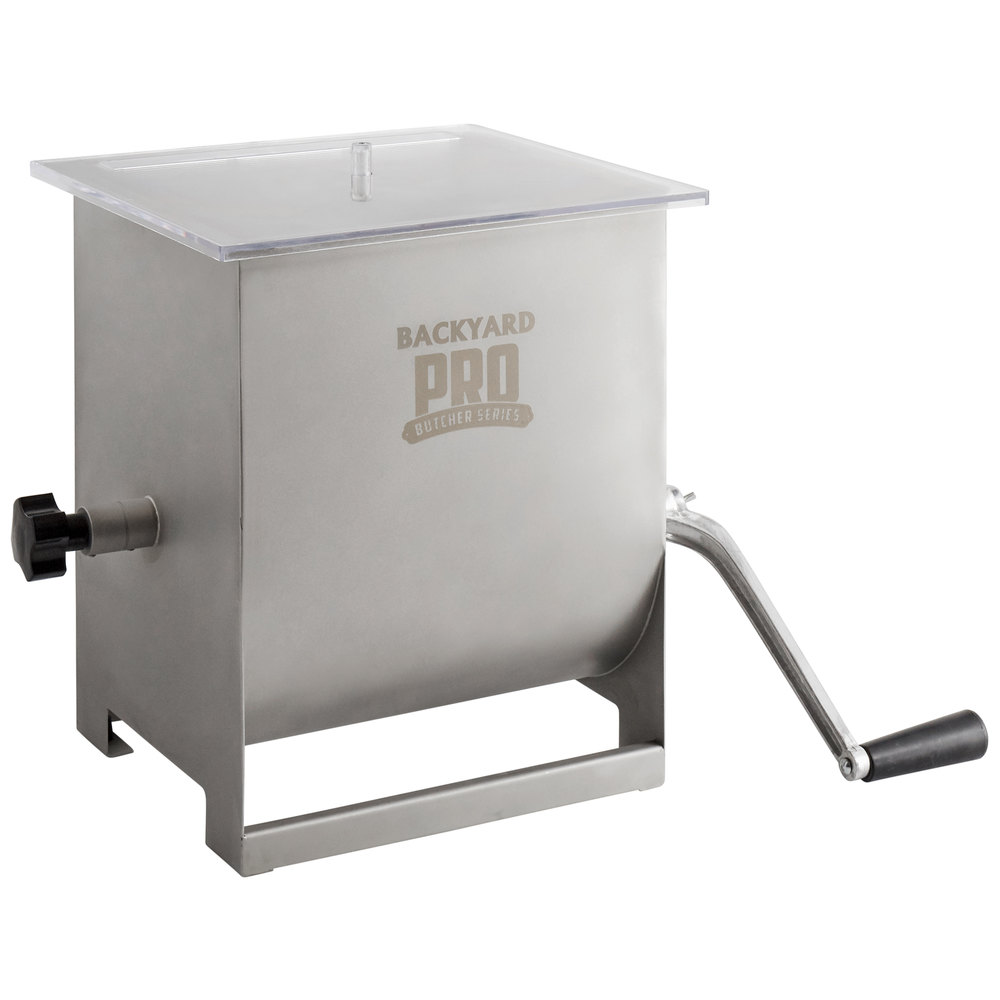
For a lot of years, I didn’t use anything other than my hands to stir the ingredients together and to be honest this device is more of a luxury than necessity. It is faster and more consistent in getting your curing salt and spices incorporated into the meat but if you’re willing to spend ten minutes doing it by hand you can get by without one. You can also add your ingredients between the first and second grind and that will get things stirred around, but still not as good as this equipment can. When I started cold curing meats, getting the curing salt even spread across all the meat became more of a food safety concern, so I got a nice little commercial grade unit for $110. If you do decide to get one, don’t cheap out, it will only cause you frustration. Get a good unit that has stainless-steel construction and metal gears.
Note: if you are familiar with this device, you know it has a common name, unfortunately, the thought police who monitor web posting have decided the name is offensive and prohibit its use. It took me weeks to figure out the reason I couldn’t post this blog is because I was using a word that has been banned. I don’t know what that word means in Hindu, but the internet monitors that greedy media moguls hire for pennies per hour to monitor us, must find it very offensive. Who would have thought that doing a blog on food equipment would put me in Dutch with the Thought Police. Believe it or not, the banned word is “m i x e r”
Item 4: Cooking Source
Hot cured meats must be cooked to at least 165 deg. F. to kill harmful bacteria that can cause the meat to spoil and can cause sickness. I feel obligated to state up front that your oven can work just fine for hot curing, but to be honest, it is not optimal. For one thing, if you cure the meat in the oven you’ll be tempted to use liquid smoke for flavoring and that’s just a bottle full of nasty chemicals no one needs….using liquid smoke would be like eating fake meat made from plants with their bucket load of chemicals. The other reason you don’t want to use an oven to hot cure your meat is that it’s hard to hot cure in the oven without the meat drying out. You can use a dehydrator, but only for something like jerky that is thin and uncased, and again, the meat will dry out. So. that leads us to smokers…..
Ladies, if you ever want to find that just right man to spend the rest of your life with, just ask them about their smoker. If they have no clue what you’re talking about and you’re the kind of woman looking for a modern metro sexual male, you’ve found your mate. However, if you’re a woman who likes to snuggle up against a man that’s a bit rugged and, for lack of a better word, manly, then you’re looking for the guy who’ll defend his brand of smoking meat as deeply as he defends his country….and ladies, admit it, that’s the kind of man you really want regardless of what pop culture is selling.
For the boys I visit with down at the rifle range, their choice of smoker is as much a deeply held conviction as liberals believing burning down buildings is a form of peaceful protest. At the highest level of distinction, smokers can be divided into two camps, electric and other; where other can be gas, wood, or charcoal. Now before you form a lynch mob against me for grouping gas smokers with wood and charcoal smokers, allow me to explain my logic. Hot curing meat requires precise temperatures, you cook so many hours at one temperature to dry the meat, so many hours at another temperature to flavor the meat with smoke, and so long at the final temperature to finish the cure. Electric smokers can control the temperature phases down to the degree, while gas, wood, and charcoal smokers have wide sweeping ranges that are more difficult to control. As an engineer, controlling temperatures during the curing process is more important than all the arguments you might make about the taste and tradition of using a wood or charcoal fueled smoker.
Where wood and charcoal smokers have it over electrical smokers is in volume. Electric smokers are usually the size of a dorm refrigerator, which for most Charcuteries is sufficient. The DIY crowd likes to use full size repurposed refrigerator, which I use for cold smoking, but unless you find a commercial refrigerator, the inside will be plastic and it’s not a good idea to hot smoke in a plastic box. However, the boys who butcher a cow or process five deer at once because everyone in their hunting party got lucky (and even got a deer), a large smoke house is in order and for that you want to fuel it with wood or charcoal. Gas smokers, in my opinion, are in between the easily controlled electric smoker and the large wood/charcoal smokers in a sort of no-man’s land. But as I said earlier, the choice of a smoker is a personal decision and just as I would never tell you what church to attend, I wouldn’t want to get between you and your smoker. What I will do, however, is tell you a little about mine….
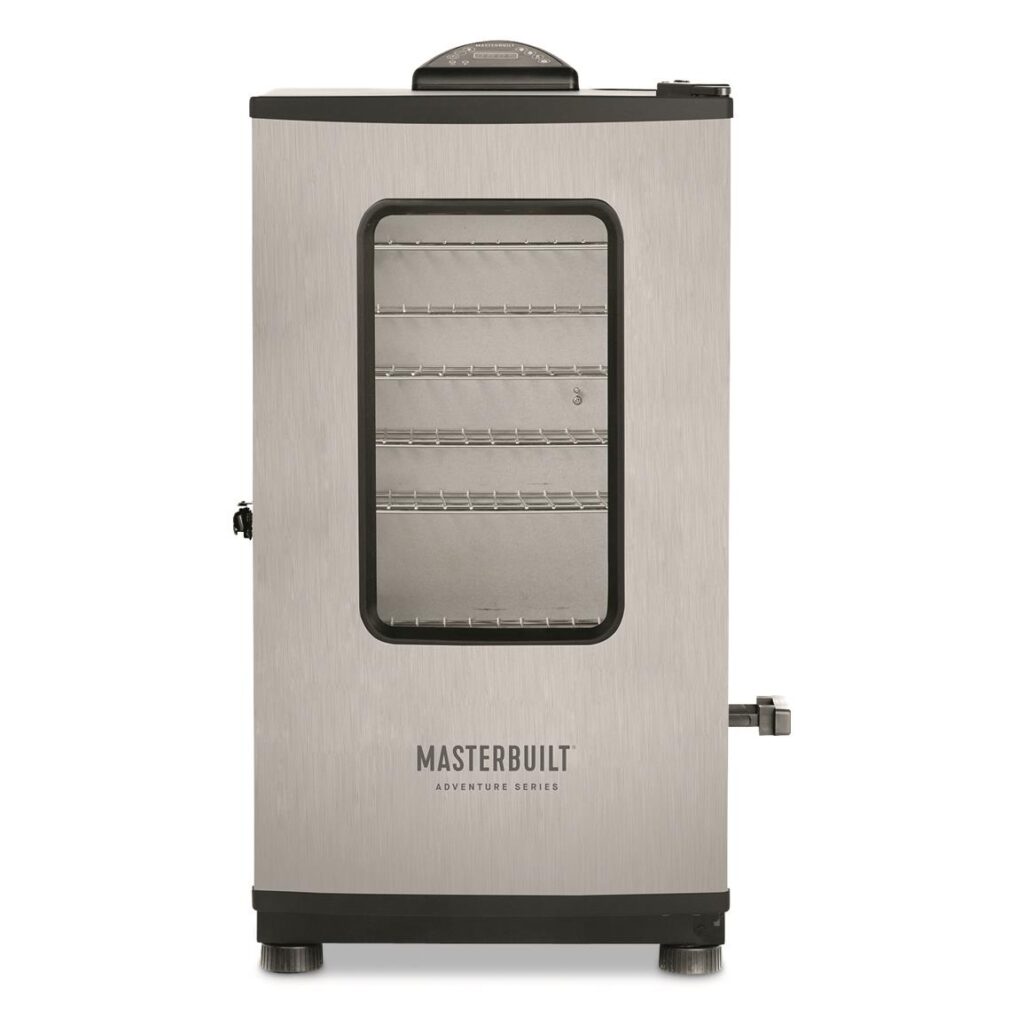
Electric Smoker: The smoker I use is a Masterbuilt that cost $300 at Sam’s Club ten years ago. This smoker uses wood chips, which I prefer over pucks, and it has to be manually fed, which I also prefer over automatically fed smokers. I have successfully smoked Thanksgiving Turkey’s and Christmas Hams for ten years and along the way made great jerky, sticks, briskets, ribs, chicken, etc. I have never had a job this little guy couldn’t handle, and the nice thing is it’s completely sealed so I can store it outside without having critters taking up residence inside. It’s stainless steel so doesn’t rust, has digital temperature and timer controls, and reliably holds a consistent temp. It has a built-in temperature probe, but I use my own because I trust it more. It also has a nice set of wheels so I can wheel it outside during operation and return it to storage when done.
Item 4: Cooking Source
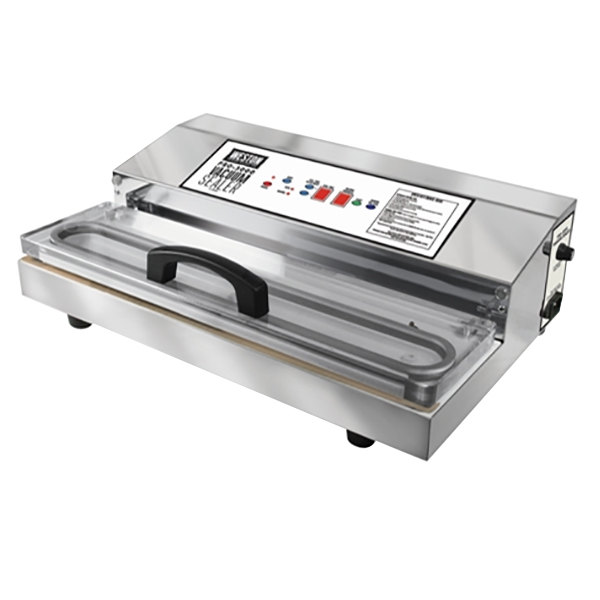
Hot cured meats must be refrigerated for short-term storage and frozen for long-term storage. For years I wrapped my cured meats in freezer paper but would always get freezer burns after a few months of storage. I then switched to vacuum sealing my meats and that problem when away. Vacuum sealed meats last longer in storage, retain their flavor better, and take up less room in the freezer than traditional wrapped storage. Another nice feature is that the vacuum bags are clear so you can see what’s inside. You do, however, have to buy a vacuum sealer. In my opinion and experience, any vacuum sealer costing less than $200 is complete garbage, and trust me, I have been through my fair share. After years of frustration and returning sealers that wouldn’t seal after a just a few uses, I broke down an purchased a commercial grade Weston sealer that has held up to years of continual use including all day use when processing large amounts of meat. This machine deploys a double seal system for melting the bags which is just an extra bit assurance the seal won’t fail. It can also pull a vacuum on contents that has liquid which is a very nice features most vacuum sealers don’t provide.

Comments are closed