
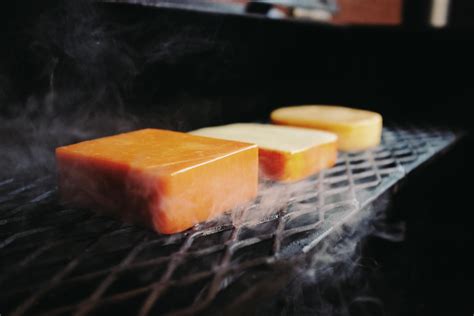
For thousands of years, smoking perishable foods has been a method for extending shelf life as smoke contains antibacterial preservatives. Today food is smoked as much for flavor as for preservation and the two primary methods are hot and cold smoking. Cold smoking infuses smoke flavor in the absence of heat and is primarily used either in foods that don’t need to be cooked, like cheese, cured fish or salami. It is also used to impart a smoky character to foods that will be cooked, like marinated meat or sauteed vegetables. Cold smoking does not heat the smoking chamber, so the challenge becomes how to burn the wood chips without generating heat. The answer, which Occam would find a stroke of genius, is that you don’t.
The trick to cold smoking food is to burn your wood somewhere else and duct the smoke into your smoke chamber. Initially I was going to build a cold smoking chamber because I thought it would make a nice woodworking project. In doing research, I found a lot of people doing a lot of things wrong, such as using plywood or OSB for a smoker box. You don’t want to use processed wood for a smoker box, unless you’re into poisoning your body with chemicals because processed wood contains formaldehyde’s. I also know from my days running a distillery that you should avoid pine as the sap has nasty toxins, which is why wine and spirits barrels are never made from pine. Likewise, you want to avoid using galvanized metal as it too can release toxins when warm or in contact with meat.
If you plan on making a smoking chamber, think about the woods that have for centuries been used to store food, like oak, hickory, maple, alder, cherry, etc. Using hardwood is expensive, but so is a trip to the hospital with food poisoning. In reading about early American smoke houses, I found that cedar was often used. At first, I thought it was a matter of availability, but then realized it’s about cedar’s aroma and how it is a bug resistant wood. Redwood is heat resistant and good against bugs, which is why it was a popular siding. Redwood holds up well to weather, which is why it’s used for decking and in saunas. It is not particularly strong, but a smokehouse doesn’t need to be uber structural. As with anything in life, the solution to any challenge is observable if you take the time to logically observe.
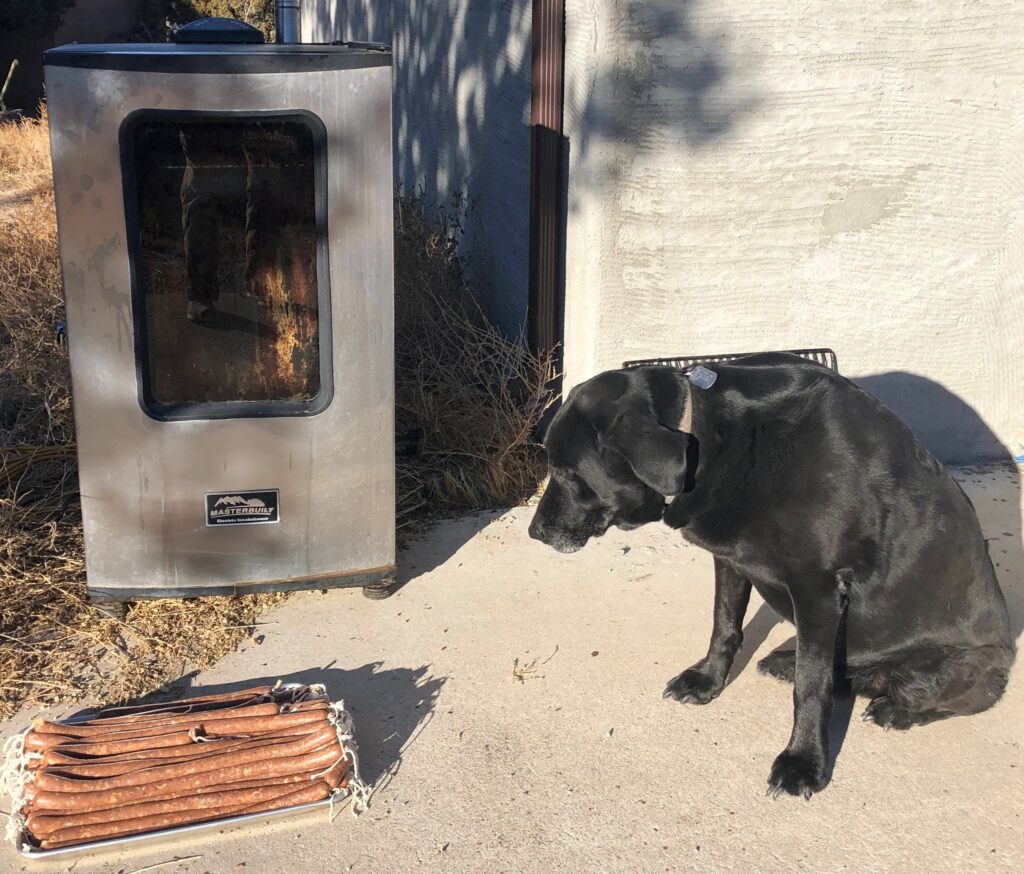
While building a wood smokehouse remains on by “to do” list, I have for now modified my hot smoker to do double duty as a cold smoker. The advantages are that it is insulated, has heavy duty racks, is already seasoned, is sealed from insects and rodents, and has good natural air flow. The disadvantage, as my Sous Chef here constantly points out, is that the smoker could be bigger. But, as I remind him, life is, if nothing else, about compromise.
As I mentioned, the challenge in cold smoking is infusing smoke into food in the absence of heat. This is far less a challenge in winter, but the goal should be year-round smoking because smoked salmon is just as good in July as it was in January. That means you need a smoke generator that can generate smoke and heat but only channel smoke into your chamber, and if thinking about how to solve that challenge doesn’t excite your inner engineer, there’s something fundamentally wrong in your life . . . we can address that in another post.
If you search smoke generators online, you’ll find prices ranging from a few bucks to a few hundred dollars. At the low end, are smoke tubes that simply sit in or on your grill with the lid closed. At the other end of the price spectrum are smoke generators that attach to your existing hot smoker and pump smoke into the chamber.
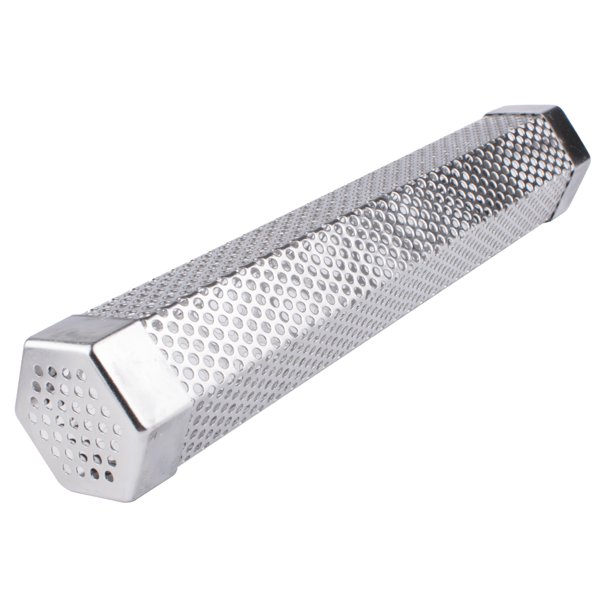
Smoking tubes, such as this one, are a great innovation. You fill these bad boys with wood pellets that once they start burning, will smolder for up to eight hours, generating low heat smoke. Smoke tube manufactures claim that they can be put directly into a smoking chamber and will not raise the temperature, but you must ask yourself if this makes logical sense. As the adage goes, “where there’s smoke, there’s fire,” and a fundamental law of thermodynamics is that the by-product of combustion is heat.
My experience is that placing a smoking tube inside a smoking chamber, even during high mountain winters, generates too much heat to qualify as cold smoking; cheeses end up partially melted and fish gets too warm to successfully complete it preservation process. Also, putting a pellet-based smoke tube directly in the smoke chamber infuses food with a harsh bitterness that is best avoided. However, smoking tubes combined with a smoke generator are a great way to get 8 hours of smoke that can be pumped into a smoking chamber without raising the ambient temperature or imparting bitterness to food.
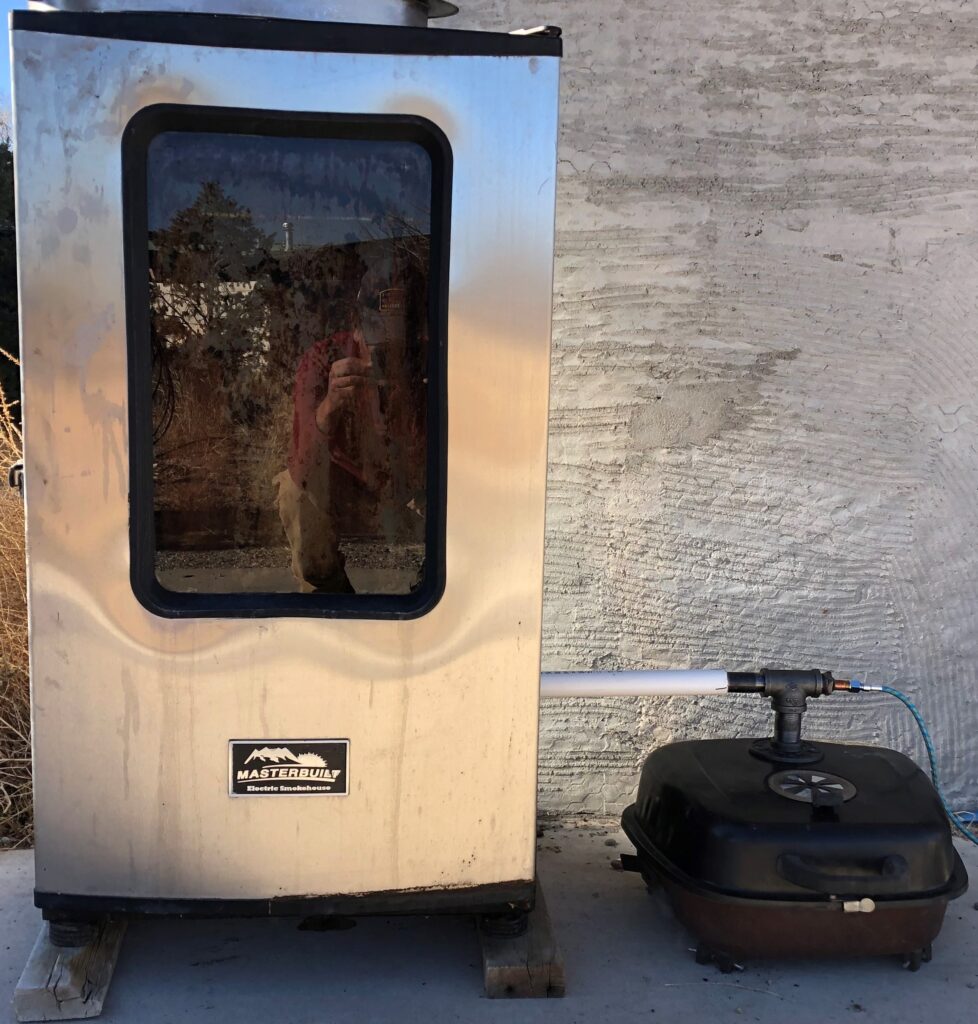
My cold smoking setup consists of a traditional hot smoker with DIY smoke generator that cost $35 to build but you can make one for under $15 if your are willing to sacrifice some utility. My smoke generator is all-weather, maintains even combustion (i.e., air flow in the smoke generator), keeps a constant stream of cold smoke in the smoking chamber, and has the option of using either a smoke tube with pellets or traditional wood chips burned on a small bed of embers. The smoke generating chamber itself is an old Hibachi grill I picked up at a garage sale for $2. Any chamber that can hold the smoking tube and that you don’t mind cutting a hole in for the exhaust/venturi system will work. This can span the spectrum from an old enamel coated roasting pan with lid to a cardboard box, your only limitation is your creativity and willingness to innovate.
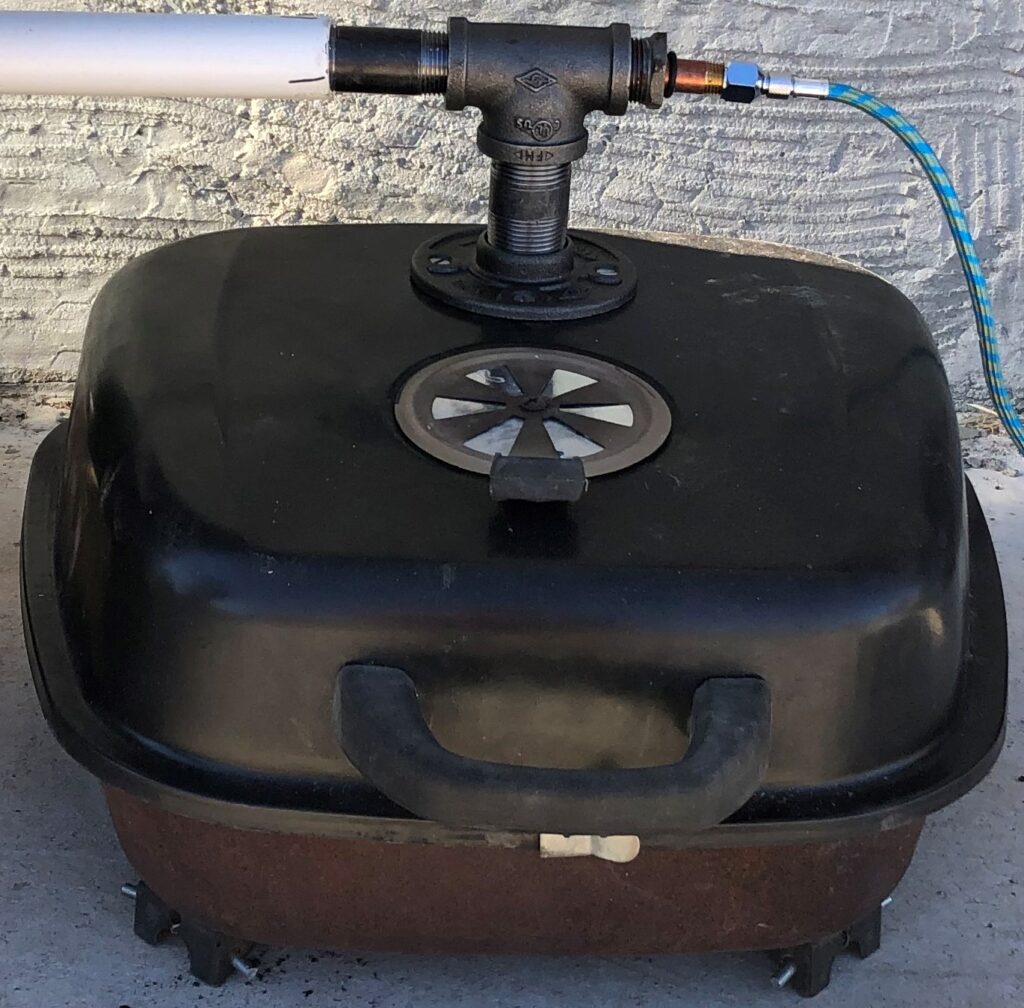
The exhaust/venturi system on my smoke generator is constructed from a 3/4″ x 1″ black tee with a 3/4″ x 1/2″ bushing at one end for the brass venturi tube and a 3/4″ nipple at the other end for the exhaust. A 1″ section of Schedule 40 PVC pipe slips over the nipple and feeds into the wood chip insert of my hot smoker. The black pipe, along with the 1/4″ x 5″ brass venturi tube cost $19 from Supplyhouse Plumbing, which is a great online source for plumbing parts and fittings. This same setup could be done with PVC pipe for $3, but then you couldn’t burn wood chips over embers because the heat would melt the plastic. You could, however, use the smoking tube, which cost $13 on Amazon, with the PVC exhaust controller.
I chose to use black pipe and an old Hibachi grill because I wanted an all-season smoke generator that would hold up to rain, snow, and high winds and have the ability to burn wood chips over embers. Resist the temptation to make the chimney too large or your ability to push the smoke through the pipe with a soft air flow will be diminished. For the mechanical air flow, I found a mini air compressor at a thrift store for $4. It pumps about as much air as a aquarium pump, which also makes a good smoke generator pump. A 1″ chimney with a 3/4″ exhaust provided my smoke generator an optimum smoke to air flow balance. The goal is to assist the smoke to make its journey through the PVC pipe and into the smoking chamber without creating turbulence so in this matter a smaller pump is better. You want the smoke to softly enter the smoking chamber and then gently make its way up and out.
You’ll notice I use the hot smoker’s wood chip insert tray to introduce the smoke from the smoke generator into the smoke chamber. To seal this opening, I simply pack used plastic grocery bags around the PVC exhaust pipe. This provides a quick and simple setup that can withstand the elements Mother nature demands I overcome.
Another advantage to using the repurposed Hibachi grill is I can use the smoking tube with wood pellets or build a small bed of embers and feed regular wood chips to the fire. I like this option because it lets me add smoke nuances, like piñon wood chips I gather from my log splitting area. If you have ever walked around Santa Fe on a winter night and smelled the mesmerizing aroma coming from hundreds of homes burning piñon firewood, you know the special flavor piñon smoke can add to food. It’s why things like piñon coffee and piñon salsa are northern New Mexico staples. Very few other DIY smoke generators provide this sort of flexibility, so keep your eyes open for a Hibachi grill on your Saturday morning garage sale runs.
During the smoking process, I either start a bed of wood in the bottom of the Hibachi or fill the smoking tube with wood pellets and start that. The advantage to the smoking tube is that once the pellets get going, they can smolder for 8 hours without having to open the grill. The natural fire needs to be be fed every half-hour or so, which can either be fun if it’s a slow day in the life of you, or a pain in the ass if your life is as hectic as mine usually winds up being. Sometimes I open the vent of my smoking chamber all the way and if the wind conditions are calm, let natural convection draw the smoke from the smoke generator into the base of my smoker. If wind conditions are not conducive to natural convection, I resort to mechanical means and push the smoke into the smoking chamber using the venturi.
Cheese requires the least amount of cold smoking, and depends on multiple constantly changing factors, like the type of cheese, the type of wood your burning, and the weather conditions. Smoking times for cheese can range from a couple hours and up. I would not recommend more than five hours unless you like intensely smoky cheese. But again, that depends on your cold smoking setup and the constantly changing smoking conditions.
I sometimes smoke vegetables for a salad or an entree just before serving, but for that you need a light infusion, and the smoker should already be going from some longer-term project. The other day I smoked carrots, onions, celery, and a ham bone for one hour and then used them to make Navy bean soup. I have also smoked pâtés for an appetizer, but usually if I want to incorporate a smoky flavor into an appetizer, I’ll use smoked cheese of fish. I tried to use the cold smoker once to proof bread, it worked for the second proof, but I didn’t enjoy the smoky flavor of the bread. Perhaps with the right savory bread recipe smoking the dough would be valued-added. What I am suggesting through these rather random experiments is that you can have a lot of fun with a cold smoker and should not constrict yourself to just meat and fish. That would be like eating buttermilk pancakes and fried eggs every morning for breakfast, which is something I had to suffer through as a thirteen year old ranch hand.
I mentioned earlier the uber low-cost alternative you can use for a smoke generator made with a cardboard box and PVC pipe. If you don’t have a hot smoker you can modify for cold smoking, you can always use a cardboard box for a smoke chamber. All you need is two pieces of PVC pipe to span the width of the box and some duct tape – because anything can be made from duct tape. You simply cut four holes at the same elevation on the sides of the box and insert the two sections of pipe. Then, use a rack from your oven to set on top of the pipes for a rack. You next cut a input port to match the smoke generator’s PVC exhaust pipe. You also need to cut a chimney slot on the top to create air flow. The chimney hole does not have to be more than a inch or two in diameter and you can lay a four-sided cheese grater over the chimney of regulate air flow depending on what side of the grater you place against the opening. I don’t think I’ve ever been in a thrift store that didn’t have a four-sided grater.
The goal of cold smoking food is to create a nuance not a dominance. Hot smoked foods are meant to possess a dominate smokiness but not the foods we choose to cold smoke. Even cold smoked salmon should possess a full but delicate aura of smoke. It’s like the balance a man’s man strives to achieve on date night; trying to appear dapper without looking overtly metro sexual. I prepared shrimp once in a grappa-based marinade that I then cold smoked for half an hour before sauteing in clarified butter. That turned out pretty good as the fruitiness of the grappa married well with the ruggedness of the smoke.
If you go the DIY cold smoker route, it is important to weigh down the smoking chamber. You can do this by placing a pot filled with water on the bottom. The water will provide added benefit by helping to regulate the smoke chamber temperature and provide humidity, which if live in a desert like me, can be a big deal. The trick to a cardboard smoking chamber is getting good air flow around the food; if you’re only using one rack, place it 2/3rds the way up the side. I encourage to move past the quick and easy disposable cardboard smoker and explore things that can be repurposed. You can use about anything for a smoking chamber, from a used frig to a hot water heater tank. Some considerations for your choice of smokers is the material, the shape, and the ability to: gain access, seal, add racks, and create proper air flow. Plastic is not suitable, nor is anything that might warp, tip over, contain chemicals, or collapse when weighed down. Thermo protection may become an issue depending on the time of year you intend to smoke.
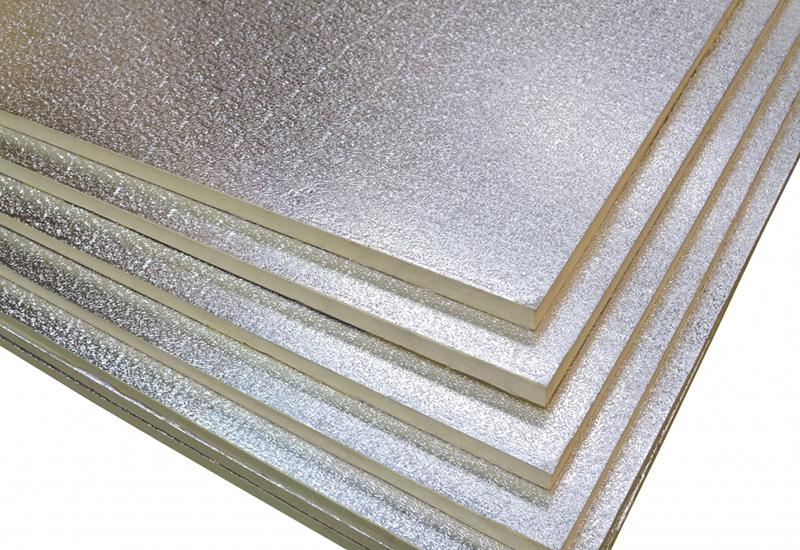
I’ve long thought that lining a cold smoker with foil wrapped insulation would make a nice internal lining. Not only does it have a clean look, but it’s smooth surface will help air flow and it’s easy to seal all the seams with foil tape. I’d use structural board with aluminum foil. With that as an interior liner, you can convert any structurally sound container into a cold smoker. The fun in that is it makes garage sale Saturday an even more exciting adventure.
Most Important Note: Unless you are single and living alone, I would not recommend cold smoking in the house…..I tried that once, it didn’t end well for me, even though I have a nice exhaust vent above my range.
